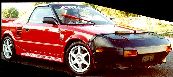
| I bought this
car in approximately May of 2000 to replace my 1986
N/A. I
found the car on XCars (the MR2 classifieds). It belonged to
someone in New Jersey. The car had a little over 100,000
miles, needed a clutch, (supposedly) needed a head gasket, had
ripped leather interior, but was in good shape as far as the body
was concerned. Carl and I drove to New Jersey to pick it up,
and were pleasantly suprised that it ran very well, and the body
looked GOOD!
It had some VERY Minor
surface rust on the inner lip of the driver's side wheel well, had
some decay on the bottom of the car under the fiberglass body kit,
and was beginning to rust through on the lower left rear
corner. I cut out the decayed area (it was relatively small)
and fiberglassed it in. (It can't be seen at all..its on the
underside of the car). I ground out the beginnings of the rust
on the lower left corner and the wheel well, and Carl resprayed
those small areas for me. That took a total of about 2
afternoons...very small amounts of problem areas.
The headgasket was
apparently fine. The car ran better than I'd ever hoped.
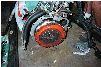
The initial plan was to pull the engine right away and rebuild it,
but it ran so good, we pulled just the tranny and I put on a
Centerforce Dual friction clutch. I drove the car all summer,
with the only problem being the clutch hydraulics (about 2 months
after the clutch went in). Last winter (2000-2001), the
decision was made to pull the engine and rebuild. Why?
Why not! I wanted more boost, and I LOVE my car, so I figured
a brand new engine would be a good place to start.
The saga follows below:
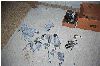 |
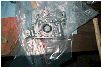
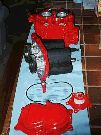
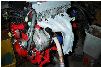
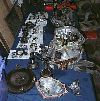
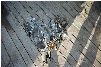
Here is a bunch of parts after
sandblasting. I sandblasted EVERYTHING (except the
block, and a few sensitive items like the AFM). |
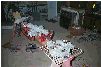 |
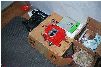
Parts in the process of
powdercoating. Carl and I are set up to powdercoat
relatively small parts. It takes time (for sandblasting
and cooking), but its worth it. This picture gives an
idea of the size of the shop...this is about 1/30th of the
shop. |
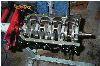 |
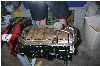
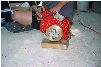
Here is the engine block with the
crank and pistons back in. I had the block, pistons, and
rods tanked and cleaned at a local machinist. We just
painted the block...Sand and engines don't mix. |
 |
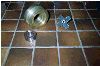
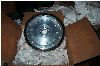
My new oil pump. Those
suckers are expensive, so I took a picture. Since I was
doing a rebuild, I figured it was worth the extra money for
the oil pump. |
 |
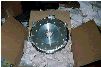
Oil pump and oil baffle on the
engine. |
 |
ARP head studs. Note:
The head stud towards the passenger side front interferes with
the distributor. I just ground a little off the
distributor gear to make it clear the head stud. I took
pictures but they didn't come out. |
 |
I had a 3-angle valve job done at
Apex Auto Machine outside of Chicago. They specialize in
high performance head work. Carl dropped it off and said
that there was a Ferrari V12 on an engine stand....good enough
for me. It was expensive though.... |
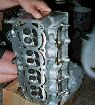 |
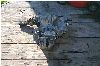
The bottom.... |
 |
Block, head, and oil pan. I
powder coated the oil pan. |
 |
cams, water pipe, etc. |
 |
Timing stuff. I powder coated
the rear timing cover just to be clean. I'm paranoid, so
I used almost all Toyota stuff on the rebuild. |
 |
Timing covered up. |
 |
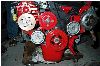
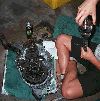
TaDAH.....! Never, NEVER,
ever take apart your SC. Carl and I learned this the
hard way. We wanted to make it pretty...big
mistake. For starters, the bearings are not
available...anywhere. The simply do not exist. And
they are impossible to get out. The are held in the case
with a high strength glue which fills a groove in the case and
the bearing outer race. Carl's dad Andy welded a big
bolt to the outer races, and then used a piece of pipe and a
big washer and bolt to get them out. I found a bigger
bearing, had the case machined to fit the bearings, and then
put it back together. It was much harder than it
sounds. It was **cough, cough** probably worth it
though. The bearing that is on the driven rotor side was
pretty burnt up. It practically fell apart in our
hands. Anyhow, don't ever do this. |
 |
The new bearings in the case.
The bearings in the other side are always in contact with oil,
so they weren't messed with. |
 |
The Supercharger back together. |
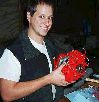 |
Proud Uncle Carl..... |
 |
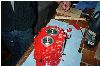
The Piece de Resistance. I
didn't want "no stinking Crank pulley". I
wasn't too keen with the whole overdriven water pump, and the
clutch on the original pulley was all but destroyed. So
Carl made me an aluminum SC pulley, with a ratio slightly
larger than that of the Cusco/Nevo variety. And I don't
have a stupid clutch. The idea with a supercharger is
power NOW, when you need it. And those clutches
definitely have a delay. I warn all of you...your SC
clutch is on its last legs..and they're expensive. |
 |
We're currently testing this bad
boy. If it works out, we might have some
manufactured. We're not sure of the price yet..or if its
even possible. More later.... |
 |
Pulley end.... |
 |
I had my injectors cleaned at RC
engineering in California. They send you a sheet telling
how they were, and how they are. Before cleaning, my
injectors all dripped and flowed like 365 cc/min. After
cleaning, all of the injectors flow at greater than
390cc/min...good for over 200hp. |
 |
I used some miracle exhaust manifold
paint (Disclaimer...I sandblasted the parts first which
helps). Carl told me it wouldn't work. 600 miles
and it still looks good...hmmm.. |
 |
Piece de resistance part 2.
the Fidanza flywheel. Its very pretty. This is the
back. |
 |
Flywheel front. |
 |
Flywheel on the engine. |
 |
The Centerforce Dual friction
clutch. (it was on the year before..that's why its
dirty) |
 |
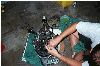
Umm..I conned SuperCarl into taking
apart my transmission. Talk about a leap of faith.
The synchros for second and third were terrible, so I figured
"what the heck". |
 |
Carl, reassembling. |
 |
Take 2. |
 |
Tranny, sandblasted and pretty. |
 |
take 2. |
 |
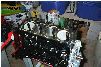
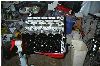
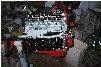
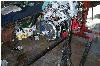
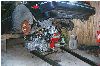
Engine ready to go in car. |
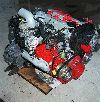 |
Engine, still waiting. |
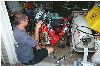 |
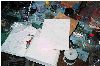
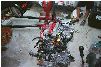
Last minute shindigs. |
 |
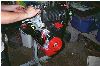
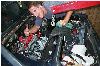
SST 69. Lift car very high,
set back down on cinder blocks with a 4x4. move engine
stand. Very carefully roll engine under car. Put
engine stand back. Pick Car back up. Put down onto
engine. Carl and Ed posing. |
 |
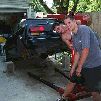
Car, being lowered. |
 |
From top, car is down. |
 |
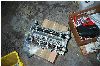
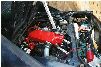
Next, pick engine up into car....Its
mounted here. Carl's doing the Japanese import magazine
pose. (If only we could get the parts here that they do
there) |
 |
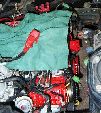
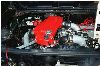
Piece de...whatever. The
air/water intercooler from a Celica. I bought mandrel
bent pipe from summit, SuperCarl welded it for me.
PowderCoated of course. (the pipes, not the
intercooler.) |
 |
Another view. |
 |
Oh...I have JL Audio 8's under my
seats. I copied the idea from superCarl. (he's got
tens...and way more skill than I do). I hammered out
dimples in the bottom of the car where the magnets go, then
built boxes out of fiberglass, wood, and a lot more
fiberglass. It was hard, but very worth it. No
ghetto boxes behind the seats or in the front trunk. And
I can still take out the T-Tops. |
|